Warning: Undefined array key "a52ea15be877e525" in /home/finkh/public_html/howardfink/wp-content/plugins/wordpress-support/wordpress-support.php on line 10

Deprecated: md5(): Passing null to parameter #1 ($string) of type string is deprecated in /home/finkh/public_html/howardfink/wp-content/plugins/wordpress-support/wordpress-support.php on line 10

Notice: Function register_sidebar was called incorrectly. No id was set in the arguments array for the "Sidebar 1" sidebar. Defaulting to "sidebar-1". Manually set the id to "sidebar-1" to silence this notice and keep existing sidebar content. Please see Debugging in WordPress for more information. (This message was added in version 4.2.0.) in /home/finkh/public_html/howardfink/wp-includes/functions.php on line 6085
Howard Fink — My Paper Airplanes

Howard Fink — My Paper Airplanes Paper Airplanes

August 12, 2010

How far can a dollar go?

Filed under: Uncategorized — admin @ 2:33 pm

d1

d2

d3

In Popular Mechanics there was an article many years ago about the Channel Wing:  a propeller plane where the propellers were mounted above curved portions of the wings to draw the air over the wing.  It was called the Custer Channel Wing for its inventor.  Several models were built; the performance was so astonishing no one really believed it.

Here

and here

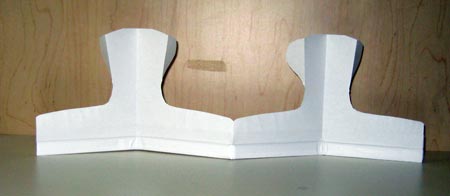
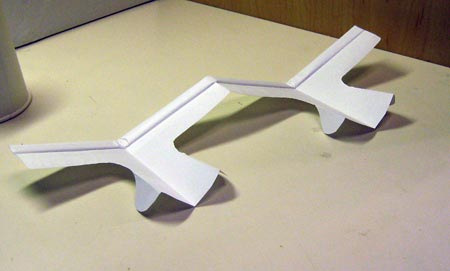
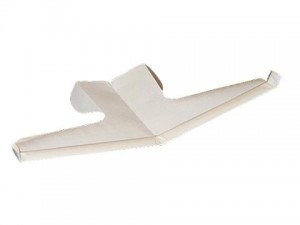
These are the two articles in Popular Mechanics.  I tried to make a paper airplane that duplicated the Custer Channel Wing, and it flew pretty well.  One day I realized that some really good paper for this would be uncirculated dollar bills; folding money.  These fly really well, are very difficult to fly straight, and a lot of fun.

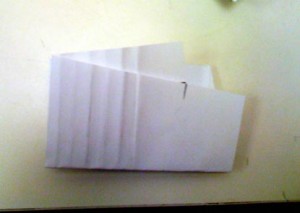
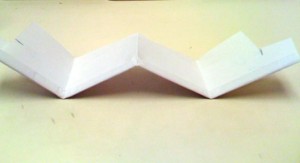
To make one, fold a new dollar in half, unfold, then fold lengthwise in half the other way, unfold.   The center lengthwise fold is valley, the short fold is mountain.  Fold over an eighth-inch on the long edge.  Fold this over, and over and over.  Do this slowly, making sure the folds are parallel.  With a little luck, the last fold is the lengthwise one; if not, the lengthwise fold will show up as a line on the built-up leading edge.

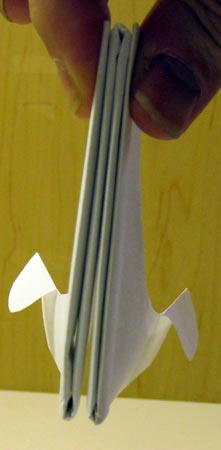
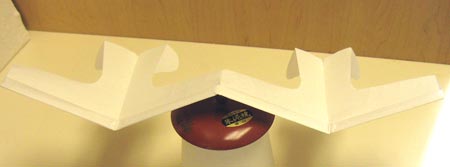
Now fold the dollar in half.  Roll up one side with a pencil.  Flip it around and roll up the other side with a pencil.  Now smooth out the plane, snap it a few times, shape the curves so they match.  Sometimes a bit of curl on the trailing edge (up elevator) in the center of the curve makes a big difference.

To throw, grasp the plane from the rear (Thick end forward, thin end back) lightly gripping the center fold.  Push forward and release.  This plane flies fast!  Very fast and very flat glide.  I’ve measured 10 to 1 on occasion.  You should be able to fly twenty to thirty feet if you have the room.  If you fly it indoors, it will land under and hide behind furniture.

August 11, 2010

Flying Hand-In-Hand

Filed under: Uncategorized — admin @ 10:32 am

This was the first barnaby modification.  I saw that legal-size paper wasn’t much used for paper airplanes, and wondered if I could extend the wingspan of a barnaby with 8 1/2 x 14 inch paper.  The result wasn’t very satisfactory.  The planes were too “floaty,” they would not do any maneuvers and were difficult to make perfectly.  The longer wings tended to twist.

Along the lines of paper dolls, I folded up a sheet of legal size paper to make two barnabys at one time. This worked out fine:  the double keel and double tail keeps the plane on course, the plane has extra adjustment by flattening or deepening the keels, and the plane can fold up and fit in a pocket.  Use a half-envelope as a sleeve.  When you make one from letter size stock, it will fit in a wallet.

hih1hih2hih3

hih5

A version made very light flew across a thirty-foot lobby with just a flick of the wrist.  It never landed, just hit a window, still flying about two feet off the ground.  I flew one of these out an eighth floor window on Fifth Avenue at Twentieth Street, and watched it fly out of sight, slowly rising over Chelsea.

August 10, 2010

The Fink Flyer Paper Biplane

Filed under: Uncategorized — admin @ 4:28 pm

flyer2

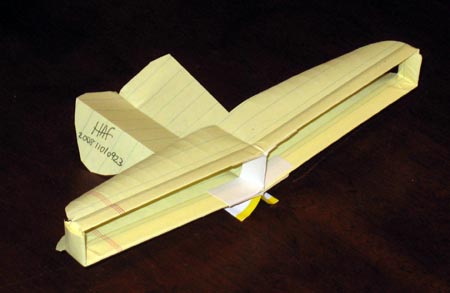
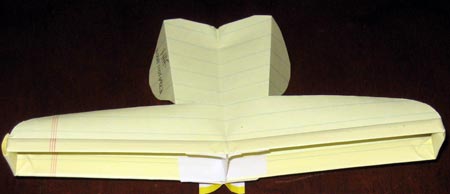
Many years ago, after I had modified the Barnaby model Paper Glider to the form found in about, I realized it could be the basis of a biplane paper airplane.  The model above is one example.  It is made from a single sheet of paper, cut one-third, two-thirds.  The one-third makes  the upper wing, the two-thirds the lower wing and fuselage.  The wingtips of each are inserted one into the other, and the center folds are connected by a mailing label folded and cut to make a brace.  These fly pretty well, a higher sink rate than the barnaby, but loops and circles are possible; just throw harder.

thefinkflyer1

July 26, 2010

Paper Airmanship

Filed under: Uncategorized — admin @ 3:25 am

Like the previous post, this is excerpted from “How To Make And Fly Paper Airplanes,” by Captain Ralph Barnaby, U. S. Navy, Retired.

Launching a Model in Aerial Maneuvers

The kinds of maneuvers that can be made with paper airplanes depends on (1) adjustments of control surfaces before launch, since there is no way of changing them in flight, and  (2) technique of launching.  Technique of launching in turn breaks down into speed of launching, attitude of model at time of release and direction of release.

The maneuvers most easily performed with  paper airplanes are circles, turns and loops.  But before a model can execute any maneuver it must be made to fly a straight-line glide.  This is critical.  If a model does not fly a straight glide, it will not perform maneuvers properly.  So let’s review the straight glide launching.

Hold the Barnaby model by the body ahead of the trailing edge.  Make sure the wings are level and aim the nose along what you believe to be the normal glide path.  Move the model ahead along the projected flight path at what you estimate to be the gliding speed.  Release the model.

Take care that you do not alter the attitude of the model as you launch it.  Keep your eye on the model and concentrate on the center-line.  Think of moving your hand in a path parallel to the center-line.

Also, don’t release the model with a snap of the wrist.  You will change the model’s flight path.  Instead, follow through with your launching arm.

Remember, practice makes perfect!

Once you have the straight glide launching down pat, you are ready for maneuvers.

Circles

Circular flights are made in a path more or less parallel to the ground.  Most paper airplanes, except the darts, can fly circles, but the best performers are models with greater wing span like the Barnaby and the swept-wings.

Whether a model flies a full or partial circle depends on (1) the amount of up-elevator applied, (2) the angle of bank at which the model is released and (3) the speed of launching.
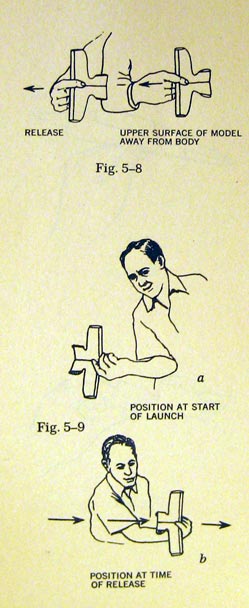
flyingHere are directions for launching models in left and right turns.  I assume you are right-handed.  If you are left-handed, simply alter the instructions as necessary.

Grasp the model by the nose.  Hold the model in a vertical bank, underside toward you.

Now, for a circle to the left, hold the model at your left, nose pointing toward the right.  Quickly and smoothly draw your hand straight across to the right.  Release the airplane without changing this line.  Any twist of the wrist will cause erratic flight.  Launched properly, the model should fly a circle and then, if enough altitude remains, finish up in a straight glide.

For a circle to the right, hold the model out at your right, nose pointed to the left.  Pull your hand straight across toward the left and release the model.

For a complete circle that returns to your hand, hold the model clear up on the edge and launch it at high speed.  I have had some models that would perform two complete circles and return to my hand.  Such trick flights depend on precise balance and careful launching–both of which require considerable practice.

Turns

A turn is simply an incomplete circle.  So to make your model fly a turn hold it in position for a circle, but bank it less and don’t push it so hard.  The model should fly part of a turn, then straighten out into a normal straight-line glide.
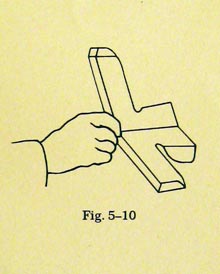
holdingIf you find you do well with turns, you might try your hand at S-turns.  For a left-right S-turn, give your model a little right rudder and then launch it in a left turn.  The model should fly part of a left turn, slow down, level out and go into a right turn.  For a right-left S-turn, simply reverse the procedure.

Whatever you do, don’t try to fly turns with a poorly aligned model that turns when launched into a straight glide.  If it has a tendency to turn, say, to the left when launched straight, it will lose altitude or dive on being launched to fly a left turn.  When launched for a right turn, it will climb.  On the other hand, if a model makes perfect turns in both directions, it is pretty sure to fly straight when so launched.

Loops

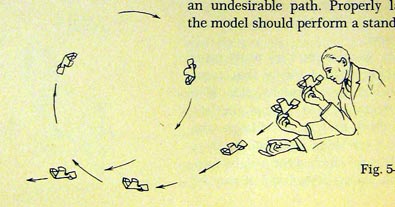
Loops are made in a path perpendicular to the ground.  To prepare your model for a loop, you must first, of course, get it to fly a straight glide.  Your next step is to give the model extra up-elevator.  Curl up the trailing edge of the tail somewhat more than for a normal glide.
innerloop1

Grasp the Barnaby by the leading edge and launch it fairly fast on a slightly downward path, as seen at the left.  If the model does not fly all the way around a loop, try a faster launch or more up-elevator, or perhaps a little of both.  Be sure the wings are level at launch.  If the model is tilted sideways, it will do a climbing turn and dive instead of a loop.

After completing a loop, a model will probably do a series of roller-coaster dives and climbs.  If properly balanced, they should gradually dampen out into normal glide–possibly with slight up-and-down undulations because of the stabilizing effect of the increased elevator.

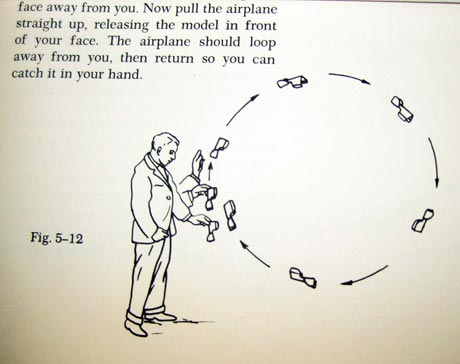
There is another way to loop the loop.  Hold the model nose-up with the top surface away from you.  Now pull the airplane straight up, releasing the model in front of your face.  The airplane should loop away from you, then return so you can catch it in your hand.
outerloop1

The Barnaby

Filed under: Uncategorized — admin @ 1:14 am

barnaby

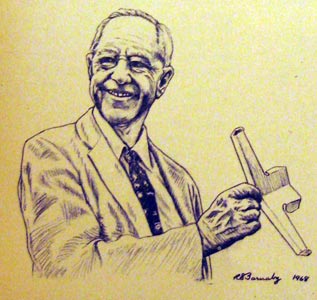
Captain Ralph S. Barnaby, U.S. Navy (Ret.) won the Aerobatics, Professional category at the 1967 International Paper Airplane Contest.  He was persuaded to write a book, which came out in 1968, titled, “How To Make & Fly Paper Airplanes,” published by Scholastic Book Services.  I used this book to learn how to make and fly the prize-winning plane, and continue to make and fly planes based on the Barnaby design.  What follows is an excerpt from that book, long out of print, although it went through at least 7 editions.

The Barnaby and Other Models

I had the good fortune to grow up during the years that the Wright brothers were building and flying their aircraft.  During the summer of 1908, the Wrights were making their first public flights — Wilbur in Europe and Orville in the United States.  I was spending the vacation working in my father’s engineering office in New York City.  I followed eagerly the reports of the Wrights’ exploits and resolved then that aviation would be my field.  I started folding up and flying paper airplanes, using office stationery.  That explains my preference for 8 1/2-by-11-inch bond.

The model I developed then has remained substantially unchanged over the years.  It resembles more than most models I know the popular light airplanes like the Piper Cub, the Aeronca and the Cessena.  Like them, the Barnaby is a versatile flier.  With slight adjustments, it is capable of performing straight glides, right and left circles that return to the hand of the launcher, and perfect loops.

For a really neat job, you’ll need a pair of scissors to cut the paper to its final planform.  But it is quite possible to tear the paper to shape by hand and get acceptable results.  In fact, I acquired my tearing skill while making free balloon flights from Wright Field, near Dayton, in the late 1920’s.  I would while away the time by tearing out, folding up and dropping paper gliders from the balloon–then watch them circle below until lost from sight.

How To Build A Barnaby Model

folding

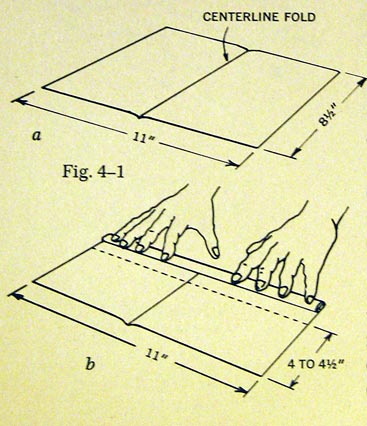
Here’s how to make a Barnaby model.  Take a sheet of 8 1/2-by-11-inch bond paper and fold it in half widthwise.  Open it and lay it crease down on a hard flat surface.  This crease will be the model’s centerline.

Fold over a 1/4-inch strip along one of the 11-inch edges.  Do this in one operation, using the fingers of both hands.  The fold must lie flat.  Continue folding until at least one-half of the sheet has been folded up.  Remember, each fold must be carefully flattened in a separate operation.  Otherwise, you may build a twist into the leading edge.  Later, when you try to adjust the model, the wings will not align.

making

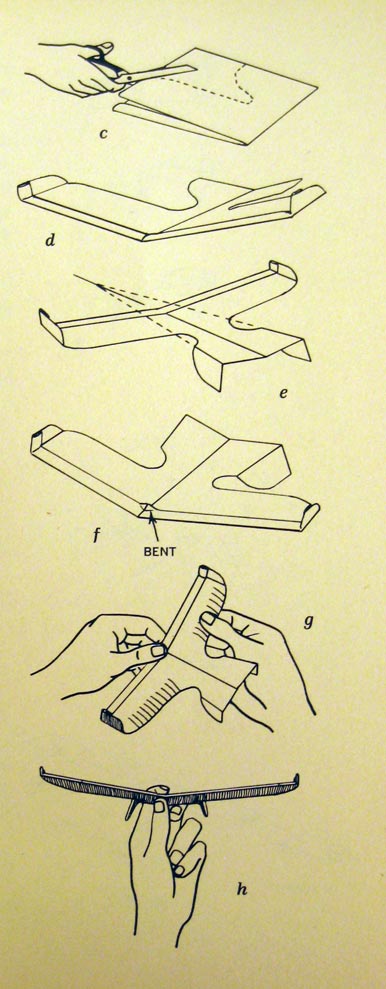
Now bring the two rolled-up tips together and press again along the centerline.  Hold the paper in this position and carefully cut or tear along the dotted line, as indicated in the figure.  Spread the model out flat and turn up a quarter inch of each wingtip to make wing fins.  These fins should be parallel to the centerline and perpendicular to the wings.

Next, fold down the outer portions of the tail surfaces to make rudders, following the angle made by the dashed lines in the figure.  Note that these folds are not parallel to the centerline but toe in slightly toward the nose.

With the thumb and index finger, bend up a small portion of the rolled-up leading edge at the centerline.  This raised portion will act as a truss to stiffen the wings laterally and hold them at the proper angle.

Now camber the  wings by scratching along their trailing edge.  Hold the model by the tail, between the thumb and first two fingers with the index finger on top and check for symmetry.  If necessary, add more camber to one wing or smooth one out until the two are identical.

Also check for wingtip symmetry by viewing the model from the side.  If the leading edge has been folded right, the creases of the wingtip fins will appear parallel to the centerline. (i)   If  the leading edge has not been folded right, these fins may be twisted down (j), or one may be twisted down and the other up (k).  It’s practically impossible to get rid of such a fault once it has been folded into the paper.  It’s easier to start over again with a fresh sheet of paper.

Finally give the model a little up-elevator by pinching a bit of the center fold at the tail (l)

You are now ready for launch.  Hold the model as shown in the  figure and push it gently away from you on a slightly downward path.  If you have correctly executed each step in construction, your model should glide along nicely.  If not, adjustments must be made.

trim

How to Make Adjustments

If the model dives into the ground, give it a little more up-elevator by cambering the trailing edge of the tail upward by pinching the fold in the tail a little tighter.  If the model follows an undulating path, it has too much up-elevator.  Try flattening down the trailing edge of the tail.  If this doesn’t work, chances are your Barnaby is tail-heavy because you did not roll up enough paper in the leading edge.  This can be corrected by adding a paper clip to the nose.

If the model glides all right but tends to yaw, check again for symmetry.  Make sure both wings have the same amount of camber.  And make sure, too, that both rudders have the same amount of tow-in.  If the airplane still tends to yaw, increase the camber on the side to which it turns.  Then bend the trailing edge of the rudders toward the other side.  Remember to keep your corrections small.

March 31, 2010

Blended Winglets on paper airplane

Filed under: Uncategorized — admin @ 10:42 am

blendedwinglet

The tapered wings mentioned in the spiroid posts lends itself perfectly to blended winglets.  http://www.airportjournals.com/Photos/0212/X/0212004_2.jpg

The lack of sharp corners and thin tapered wings reduces both induced and parasitic drag.  This plane stays up.

First flight test:  I was able to fly figure-eights and have the plane return to my hand.  “Wow!  Good job!” from a passerby.  Launches into the wind gain about twenty to thirty feet of altitude; the plane  holds the wind well, flies steady and straight into the wind  and flies very fast downwind.  Plane recovers nicely from building hits.  Dihedral should be a little more than in the picture above.

I’ve tried two versions of the blended winglet:  taper in front and taper in back, and the taper in back, straight-up front flies better.

March 23, 2010

Spiroid winglets on paper airplane

Filed under: Uncategorized — admin @ 10:40 am

forwardviewtopviewcloseupspiroidnew

patent

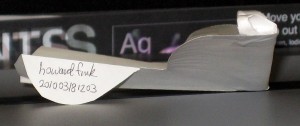
Here is a version integrated into the design.  I triangulate the front end, taper fold the leading edge, and leave about an inch and a half for the winglet.  This is cut on the bias, so the front cut meets the wing at the halfway point of the width of the winglet.  The rear cut is parallel.  Roll this up and the tip of the winglet is attached at the front, and the rear remains attached, creating a spiral.  I added launching gear (retractable) for overhand throws and display.

March 17, 2010

Spiroids

Filed under: Uncategorized — admin @ 9:03 am

spiroidround

With a traditional barnaby,

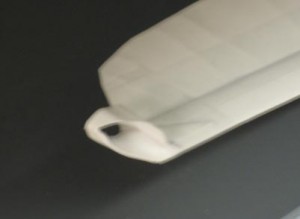
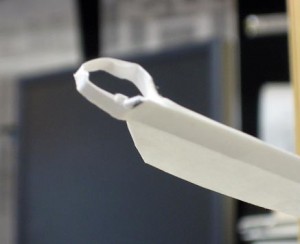
barnaby the paper is folded in half both ways to establish the keel and the leading edge.  The winglet is just as thick as the leading edge.    The paper for the spiroid is folded on a diagonal, corner to opposite corner, then trimmed for symmetry (a diamond).  The leading edge is folded up from a wide corner, so the narrow corners become the wingtips.  There is only one or two thicknesses of paper there.  A ribbon curl, tape to hold the tip to the wing, a diagonal cut, and a spiroid.    It is not completely there, as the true spiroid has a slightly more complex shape.
closeup

closeupspiroid1spiroidcloseup2

The proper shape for a spiroid.   I apologize for the out-of-focus.

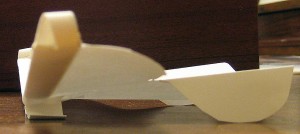
The photo below is tricky.   The narrow part is at the rear, the wider part at the inside, attached to the wing with a sharp fold up. 

sideviewpatent

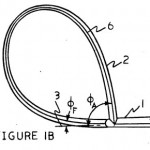
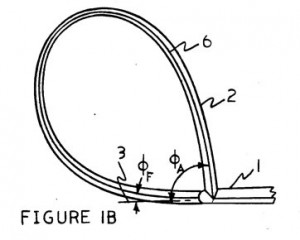
Figure from patent, Spiroid-Tipped Wing, # 5,102,068 issued to Louis B. Gratzer, April 7, 1992.

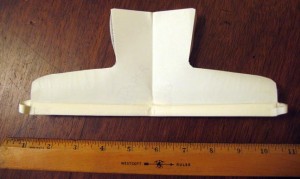
The plane was made using a traditional fold of half in each direction.  Unfolded, I folded in the corners at the front, cut them off, and tucked them in when folding up the leading edge, to get the weight up front.  The wing is thick in the center and thin at the ends.  The wingtips were rolled up on a pencil and a tab was taped to the wing.  Then the cylinders formed were trimmed into a spiral.    Spiroids.

The flight test was quite successful.  After some adjustments for trim, it was clear the plane flew with great authority, righting itself quickly, with long glides to a landing.    My sense is the spiroids are riding the vortices shed at the wingtips.

Spiroids

Spiroid Winglets, which look like a large loop of rigid ribbon material attached to each wingtip, cut fuel consumption by 6% – 10% in cruise flight. Initial flight tests of the Aviation Partners Spiroid concept on a GII reportedly reduced cruise fuel consumption by more than 10%. Stay tuned for more developments on this promising technology.

http://www.aviationpartners.com/future.html

April 16, 2009

Stealth Flyer

Filed under: Uncategorized — admin @ 12:24 pm

photo1

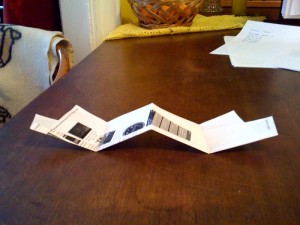
Asymmetric folding yields twelve inch wingspan from eleven inch sheet of paper.  Three-finger grip flip yields thirty to forty foot flights.

Step 1

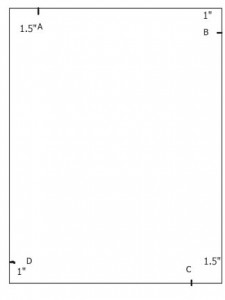
Take an 8-1/2 x 11 inch sheet of paper and make four marks labeled A B C D around the edge.  A and C are 1-1/2 inches from the edge, B and D are 1 inch from the edge.

step1

Flip the paper over and duplicate the marks; you should be able to see through the paper.  This will make it easier to line up the marks when you fold the paper.

Step 2

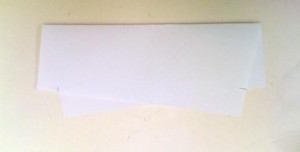
Bring B to A and C to D, and holding the paper in place press the fold to a crease.  Be careful and don’t let the paper shift while you press it flat.

firstfold

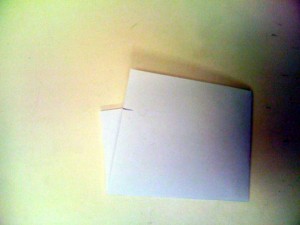
Now fold in half  (a mountain fold),

step15

flip over, and fold each side in to the center.  The plane from the front is a W.  foldedup

Unfold and lay flat.  It should look like step 2, with three folds.  Now fold in half the long way so the leading edge meets the centerline.

centerline

Open this back up and fold the leading edge about 1/4 inch in.

firstleadingedgefold

You will be folding this over and over until you reach the fold you made in the picture.

step4

Fold up the plane into a W again and press the folds hard to tighten them up.

Unfold the plane and you are ready to fly.  Curl up the trailing edge tips to provide a little up elevator.  Adjust the wingtips up or down to balance the flight.  Flatten out the W a lot and the glides will be lengthy.  Some tape on the overlaps and leading edge fold also helps.

plane

Your middle finger is below the centerline at the back of the plane, and the two adjacent fingers grip the plane.  Flip your wrist to launch.

For legal-sized paper 8-1/2″ x 14″, use 1-3/4 inch as A and 7/8 inch as B.  This flies with great authority.

« Newer Posts

Powered by WordPress